Showing posts with label shortcut. Show all posts

Thursday, August 2, 2012

Breakfast Burritos

I love breakfast food! I like it best brought to me on a tray while I sip coffee in bed, but since that's never happened ... I'll take what I can get. These breakfast burritos are really wonderful. You can eat them right away, or freeze them for future use. They can be microwaved straight from the freezer! One minute and your breakfast is served. This recipe is more on the lines of assembly instructions, since you can use whatever your family likes to stuff them.

Breakfast Burritos

First, scramble some eggs! I use this basic recipe, but you make them how you like 'em:

I use about 1 egg per burrito. Five in this case. A dollop of sour cream, a splash of milk, salt and pepper.

Whisk it together really well! Then cook 'em.
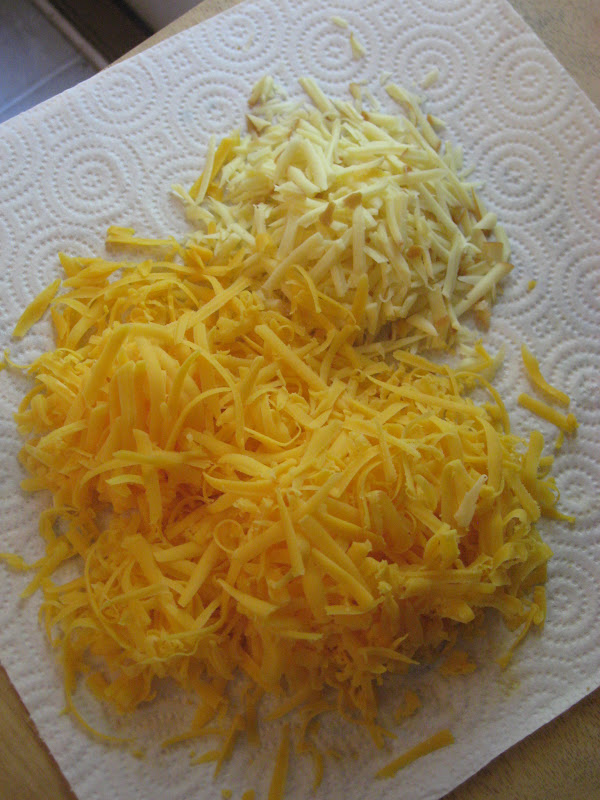
You'll need cheese, of course!

This is a mixture of gouda and sharp cheddar. I didn't use all of this - I was shredding for our dinner, too.
From this point, you can use sauteed peppers or onions; cooked bacon, sausage or ham; diced green onions; fresh herbs; anything you like in a burrito!

I used some sausage I got from my granny - It's SO good! I didn't have very much left, sadly, so I limited myself to 3 pieces per burrito.


Starting with the cheese, then eggs, layer your ingredients in the middle of the tortilla (I cup it in my hand to keep them contained), then fold them up!


Now they're ready to eat! Or, to prepare them for the freezer, wrap them in wax paper, then in aluminum foil.


If you feel sure your family will eat them fairly quickly (within a month), skip the aluminum foil and put them in freezer bags. 

To heat them, remove the foil but leave on the wax paper. Place on a plate in the microwave, and heat for 30 seconds. Flip it over, and heat for 30 more seconds. Depending on your appliance, it will probably be done at this point. If the wattage is lower (850 or less) it will need another 30-60 seconds.

Monday, December 19, 2011

Slow Cooked Chicken

I don't love housework, but I do love all the "mod cons" - as our friends across the pond call modern conveniences. There's something supremely satisfying about knowing the dishwasher, washing machine and dryer are all working away in the background while I'm busy with other things. I feel the same way about my slow cooker. Knowing that dinner is ready to go with little to no further effort on my part is comforting in a way. It's one less thing to concern myself with as we finish up other chores and work on school for the day. Other than for a meal, I also like to use my slow cooker for large batches of chicken. I buy it as it's on sale, then when I get a few packages I pull them out of the freezer and cook them all at one time. I wrote about that process in this post. I'll be doing that today! I'm cooking down about $5.00 worth of chicken which will translate to about 4 meals for our family. When I have it all packaged up, the shredded chicken will go in the freezer to await its fate in one of these recipes:

Chicken Parmesan Casserole

Thai Chicken Pasta

Chicken Ranch Casserole

Chicken Parmesan Calzones

Chicken Salad

Chicken Pot Pie

... Or any number of other fabulous options!

A special thanks goes out to our "college people", who blessed me with a new slow cooker last night! It's non-stick and stainless steel and programmable ... and I'm so excited! Thank you so much! We love y'all.

Monday, September 5, 2011

Cake Solutions- Trifle!

One thing I hate to do in the kitchen is to waste anything! It happens, but I truly do my best to make the most out of everything we have. It's amazing what little bits of food can be re-created into for future meals. One example is cake. Ever had a cake layer fall apart when you tried to remove it from the pan? Turn the mess into a trifle! Want a cake for your small family but don't need the amount that's in a two-layer? Freeze the second layer and make it into a trifle later. I don't make a lot of baked goods to have around the house. One reason is that we flat don't need it! But last week we had The Boy's birthday party. I just needed 4 cupcakes - one for each boy - and instead of trying to adapt a recipe to make a tiny amount like that I simply used a boxed cake mix and baked 'em all! I used what I needed for the party and rather than let the rest sit around for a few days, they went in the freezer. A week later, on Saturday night, they went into the fridge to slowly thaw. Sunday afternoon, I made them into a delicious trifle!

There's no real recipe involved here. You just break leftover cake/cupcakes (undecorated) into a trifle bowl, layer with prepared pudding, add more cake, more pudding, and top the whole thing off with whipped cream. My cupcakes were chocolate and I used white chocolate and chocolate fudge puddings (since I was making this for a crowd I used 2 packages of pudding), and also crumbled a Butterfinger candy bar into the layers, too.

Trifle is so easy to throw together since you can keep everything you need on hand. It's versatile since it's hard to go wrong combining cake and pudding. Fruits make a interesting addition, too. 

Thursday, March 10, 2011

Lasagna Tip

Since I recently shared with you several lasagna recipes, I thought I'd share a very helpful tip with you today. When prepping your lasagna noodles for your dish, DO NOT use your pasta pot. Grab a large skillet and layer them, criss-crossed,  in the boiling water.

Your bonus tip of the day is to add a dollop of oil into the water, and generously salt it.

And here's something just to make you drool a little:
Homemade lasagna sauce. Mmm ...

Tuesday, November 9, 2010

Snickerdoodles

Nothing beats homemade snickerdoodles, but this recipe is a good stand-in when you're pressed for time. It comes together super easily since it's one of those that uses a boxed cake mix.

Snickerdoodles
 3 tablespoons sugar
1 teaspoon cinnamon

1 package yellow cake mix
2 eggs
1/4 cup vegetable oil

Preheat oven to 375. Combine sugar and cinnamon in a small bowl. Combine cake mix, eggs and oil in a large bowl. Stir until well blended. Shape dough into 1-inch balls. Roll in cinnamon-sugar. Place balls 2 inches apart on greased baking sheets. Flatten balls slightly. Bake at 375 for 8-9 minutes or until set. Cool one minute, then remove to wire racks to cool.

Saturday, November 6, 2010

Mint Chocolate Softies

I told you a while back that I'd have more recipes for you that involved using boxed cake mixes creatively. I'm finally doing it! I've made this recipe several times with great results. The chips I used for this batch are limited edition, only available during the holidays, so snap 'em up while you can. These cookies soft and rich and taste just like Thin Mints!

Mint Chocolate Softies

1 package triple chocolate fudge cake mix
1/3 cup water (or brewed coffee if you have it)
1/4 cup butter, softened
1 egg
1 cup dark chocolate and mint chips

Preheat oven to 350. Combine first four ingredients in a large bowl. Beat with electric mixer on low speed until combined. Increase speed to medium and beat for one minute. (Dough will be very thick.) Stir in chips. Drop dough by heaping teaspoonfuls 2 inches apart on cookie sheets sprayed with non-stick cooking spray. Bake for 10-12 minutes or until set. Let cookies stand on cookie sheets for one minute. Remove to wire racks to cool completely.

Obviously, you can use any combination of flavors of cake mix and chips. I got this recipe from a cookbook called Cake Mix Magic in Minutes.

Saturday, October 2, 2010

Perfect Bacon

Here's the secret to perfect, neat, easy-to-clean-up-after bacon:

Bake it in the oven.

Yep. That's the secret! The first step is to line a baking sheet (with sides) with aluminum foil.

Next, lay your bacon out side-by-side on the pan. You may not be able to fit all 16 slices on there. I just put the rest in the fridge for another day.

Place the pan in the (cold) oven. Set your temperature to 400. Allow the bacon to bake for about 15 minutes. From this point you'll need to watch it carefully. If you like limp bacon, 15 minutes is probably good. Otherwise, check it every 2 minutes until it reaches the crispy level you like best. Keep in mind that it will crisp up slightly after you take it out of the oven, so I usually err on the limp side to allow for that.

Remove the bacon from the pan to paper towels to drain. Blot off the excess grease with another paper towel. Voila! Perfect bacon.

I know -- that's kind of redundant, isn't it?

Now all you have to do is wait for the grease in the pan to cool, then carefully and loosely fold up the foil and throw the whole mess in the trash. It's a beautiful thing.